
A remote is useful when reaching for the phone breaks your framing or occupies hands you need for a demonstration. A pedal keeps those hands free, but its button must send a key Lightshot recognizes. The remote and pedal feature page describes supported control types; no accessory model has a published device test yet.
Will your remote or pedal work with Lightshot?
It should if it sends keyboard keys such as the arrows, Page Up, Page Down, Space or Return, as keyboard-style page turners and pedals commonly do; Lightshot listens for those keys. Shutter remotes use the camera-control path instead. Buying something described as a “Bluetooth remote” does not establish which path it uses.
Read the accessory instructions for its operating mode. A multimedia mode that changes a song may not send the same key as a page-turning mode. Use the live test in remote help to establish what the app receives. Apple documents the separate hardware capture-event interface; that interface is not a certification for every shutter remote.
How do you pair a Bluetooth remote with an iPhone?
Put the accessory in pairing mode, select it in iPhone Settings › Bluetooth, then check its buttons in Lightshot.
Charge the accessory, switch it on and put it in pairing mode using its instructions.
On iPhone, open Settings › Bluetooth and select the accessory when it appears. Enter a code if the accessory requests one.
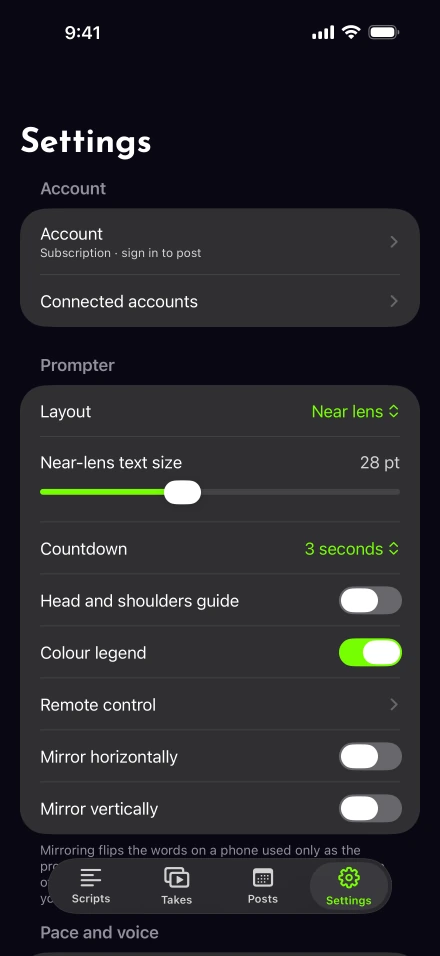
Open Lightshot and go to Settings › Prompter › Remote control.
At Press a button on your remote, press each physical button separately. Note the key the app reports.
Apple’s Bluetooth accessory instructions cover pairing and removing an old connection. If the accessory connects to another phone instead, resolve that connection before changing your prompter settings.
Once it's connected, iPhone treats the accessory as a keyboard and stops showing the on-screen keyboard in every app. Write or paste your script before you switch the remote on. When you need to type again, for example to fix a caption after filming, switch it off or disconnect it in Settings › Bluetooth.
Which button should do what?
Start with record/pause on the button you press most, and one recovery action such as redo on another. The default mapping makes Right arrow, Page Down, Space and the volume buttons record or pause. Left arrow and Page Up redo the last sentence; Down arrow deletes the last part; Return finishes. Up arrow starts with no action.
For a two-pedal setup, a practical starting choice is record/pause on one pedal and redo on the other. Keep Finish off an easy-to-bump button if an accidental press would disrupt a long explanation. These are setup suggestions, not tested hardware presets.
Understand the distinction between pausing the camera and holding the words. Hold / carry on the script leaves the camera rolling. Sentence steps also move the text without ending the take. The retake controls change the recorded material, while voice-following controls script progress.
Run a rehearsal with the camera active
Make a disposable test recording. Start, pause, continue, redo a sentence and finish. Listen for pedal clicks or handling noise. Test volume-button and shutter controls while the camera is on, because their recorder behavior depends on that state.
If a press seems to do nothing, check the live key test, the assigned action and whether the recorder is active. The mistake-recovery walkthrough explains what should happen to the script after redo. Do not repeatedly press an unknown button during an important take.
Check the audio input separately using microphone selection. Apple’s recording input settings explain the iPhone picker. Apple also describes AirPods camera controls in supported apps, but Lightshot has not been tested with those controls, so do not assume compatibility from that page.
Put the control where the movement stays off camera
Place a pedal where pressing it does not rock your chair. Hold a handheld remote low enough that button checks do not pull your eyes away from the lens. Use the eyeline test and, if necessary, a separate prompter phone to make text readable from that position.
Northern Illinois University’s recording advice favors a stable phone position and clear sound. Apply the same test to your recording setup, then keep a known working mapping. If voice-follow is unavailable, check your language options or use manual sentence steps. More setup procedures are in the guide collection.